How to Dress if you are Training or Facilitating a Group

Hi Everyone!

So this week I was super busy at work facilitating 1/2 day trainings Monday – Thursday. So, I had to put some thought into what I was going to wear.

Training, What to Wear When Training or Facilitating

I’ve done a lot of facilitating and training in my time so thought it would be a good idea to share the TOP 4 TIPS I have for dressing for training a group. Of course….even I forget my own advice sometimes… (you’ll see in a moment).

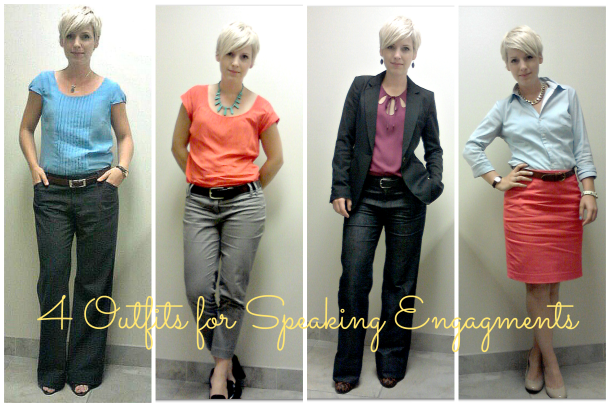
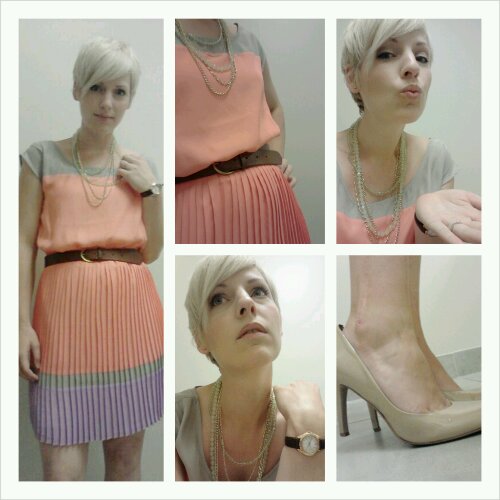
Below is a series of outfits I wore to facilitate training this week from Day 1 (Monday) to Day 4 (Thursday) this week.

What to wear to facilitate training

What to wear (outfits 1-3, left to right) What NOT to wear (outfit 4, farthest right)

1. Always dress 1 step above your audience.

In a previous life, I may have dressed to match my participants’ dress style to seem relatable, possibly because I was young and wanted to fit in with the group. After reflection though, I realized that this was a mistake. By default, a trainer is expected to have a level of expertise in a subject matter that is above that of the audience, and therefore they are trusting that you have that expertise. For example, although I work in a head office that is generally more formal, I often speak to groups of our stakeholders or regional employees that are much more informal (think jeans and polo t-shirts). So, even though I could have worn jeans and a polo T-shirt, I chose to dress a step above to look more polished, which gives me an appearance of being more serious and having expertise (whether or not that is true 😉 . )

It might seem silly, but if you dress more formally, you actually appear like you are smarter and more trustworthy.  That way, your group is more likely to listen and be open to what you are trying to teach them.

Open= Good. Resistant = Bad.

2. Wear pants.

I’m a BIG supporter of championing femininity in the workplace and as a result, dresses and skirts are a BIG part of my wardrobe. That said, there’s always some kind of reaching or stretching or bending over that needs to happen if you are training or facilitating and the last thing you need to do is flash those nice people who came to hear you speak. See my mistake on day 4 (image farthest to the left below). I thought I’d wear my new pink pencil skirt and look all polished, but really I ended up worrying about bending over the whole time.

3. Leave the busy patterns at home.

When you are facilitating, especially for 2 or more hours, it can be difficult to keep participants focused. The last thing you need to do is to wear some sort of busy and distracting pattern that drives them into some hypnotized state. Wear colour but try to keep your look simple and polished – no busy patterns or sequins please.

4. Don’t Sweat It

No matter how many times you’ve delivered the same lecture or workshop, it’s only natural to sweat a little, if only from exertion. Consequently, you risk flashing those big wet stains under your arms if you aren’t careful. So if possible, wear a jacket/blazer  or wear a shirt that won’t show you sweat. This should be tested before doing the training (obviously).

You can see in the photos of my outfits below – for the first two days (left and center left), I chose two tops that I knew from past experience wouldn’t show sweating. The third day I wore a blazer but the I made the mistake on the 4th and last day (far right)  by wearing a cotton button down shirt. Before I presented I went for a quick bathroom break and realized with horror that I had already sweated right through the arm pits of my shirt, even though I was the farthest thing from nervous since this was my 4th day presenting the same material! Needless to say, I ended up having to concentrate on keeping my arms down through the whole thing and was totally self-conscious.

So, the bottom line is that you should really think of training or facilitating like an interview situation.

Look polished but not distracting.

Dress comfortably but don’t let them see you sweat.


wpid-erin-sig.png

Related Content:

Makeup – How to Do an Easy 5 Minute Face for Work

When it comes to make up for work, I’m all for it. Make up to me is just as essential as picking out a professional and creative outfit. Looking your best (in every way) takes only a little effort but makes a huge impression on everyone you interact with.

Think about it – people are looking at you and talking to you all day which means they are looking right at your face.

Looking blotchy, shiny and generally tired means you look like you can’t handle the work you’ve been given and that you probably shouldn’t be given anything new. You definitely do NOT want to leave this impression when it’s anything but the case.

But what do you do if you don’t know how to apply make up?

Let’s be real. Makeup for work doesn’t need to be crazy, over-the-top complicated. There are several simple and easy steps that will drastically improve how you look everyday and I will share my easy steps with you in this post.

But what if I’m a mom and seriously don’t have 5 minutes to myself to apply make up?

Listen…I’m a mom of two so I  know what “no time” looks like in the morning. The trick for me is to get the kids ready and eating breakfast so that I can finish my last steps of getting ready, like make up.

That said, if you really and truly can’t find 5 minutes at home because you are juggling 4 kids… then get to work and apply your 5  Minute Face when you get there. I promise no one will miss you for 300 seconds.

Ok! Here are my tips…


  1. Moisturize, Cover & Brighten – I actually use Maybelline’s Dream Fresh BB cream in place of a moisturizer and foundation because it moisturizes enough for me and gently evens out my skin tone without using foundation too. A bonus? It has spf 30 (which I won’t leave the house without).
    • Squeeze on to your index finder and gently tap all around, starting with the areas of your inner face. Blend gently so that all areas are covered.
  2. Cover Imperfections – Luckily I’ve mostly come out of my teenage break-out years so I use this to create some coverage around my eye area (hello…no sleep with two kids under 4!). I like Cover Girl’s Simply Ageless Concealer because I find the colour really natural and easy to blend.
    • Tap a small amount on the inner corners of the eye and work up and on to the eye lid and down under the eye. Avoid the area where crows feet may occur.
  3. Remove Shine – I’m actually not picky about powders. I don’t find any one to be truly above the rest but the two that I use most often are Cover Girl Natural and Sally Hansen’s Luminous Matte Pressed Powder.
    • Use a big powder brush (not the pad included in compact) for the most natural finish. Sweep across the compact and gently dust the areas of your face that you get the most shine – this is most often your “T” zone (forehead, nose, chin).

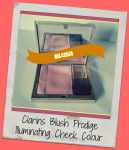
4. Blush – simply put – blush makes you look like you’re happy and young. At the same time, it can also make you look like you’re crazy if you over do it 80’s style. An easy way to avoid going down the wrong road is to use a light pink colour blush that is buildable like Clarins Blush Prodige Illuminating Cheek Colour.

    • Use the brush included or a blush brush (about half the size of a powder brush) and sweep from the apples of your cheeks to up your cheek bone. Make sure to blend to avoid the streaky 80’s look.

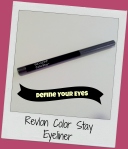
5. Define Your Eyes – This step isn’t mandatory but I think it makes a huge difference by making your eyes stand out. I like Revlon Color Stay Eyeliner because it’s affordable and has a long-wear formula so you don’t have to constantly re-apply. Who has time for that?

    • Eyeliner can be used in many ways and can actually help you take your day make up look to evening in a few easy steps. But for day time, stick with something simple  – apply it to only your upper eyelash line. In fact, I don’t apply it all the way across, I taper it starting with the outside corner of the eye and end just past the pupil for a natural effect. This essentially makes you look like you have a fuller upper lash line.

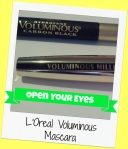
6. Open  Your Eyes – Again, you don’t need 8 coats but 1-2 coats of mascara does wonders for making you look bright-eyed and fresh. I don’t find there to be a huge difference between high-end and low-end mascaras (I’ve tried many) so I tend to go for L’Oreal’s Voluminous Mascaras. I find they wear well during the day (not a lot of smudging) but they also come off fairly easily at night too. I like to have two on hand – one that is waterproof and one that is not (just in case you are going to a wedding, or another event that might leave your weepy).

    • Just open your eyes and sweep on 1-2 coats on the top lashes only. This lifts the eye and decreases the chance of you looking like a racoon half way through the day.

sugar rose tinted lip treatment

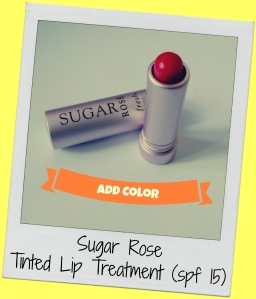
7. Add Color – I don’t find that there are many lip colours that stay put so I opt for something that is light, that moisturizes, has spf, and a hint of colour like Sugar Rose Tinted Lip Treatment.

    • Just add it on at the end and throughout the day as needed.

So that’s it! That’s the 5 minute face. Not so bad right?

Now for those of you ‘adventurous types’ with 6 minutes to spare, I have one other tool I use to create a little facial interest:

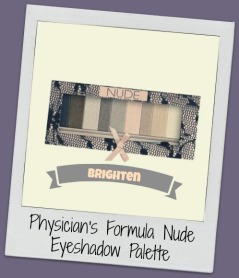
eye shadow, nude palette, physician's formula

This is the perfect, low-cost (only about $12) nude palette that works both for days and nights compare to Urban Decay’s Nude Palette. To make it even easier, the colours are paired in 3s that go together from right to left:

  • highlight – inner corner of eye and under eye brow
  • lid – all over lid colour
  • crease – use as an eyeliner or enhance the lash line/crease with a darker colour

So that’s all there is to it.

Remember, you deserve to look your best and your best will get you where you want to go. The 5 minutes is totally worth it.

Do you have any 5 minute face tips and tricks you love?

wpid-erin-sig.png

For more information and tips on 5 minute make up routines see these resources:

Summer Sorbet | How to Wear Pastels to Work

Hello summer? Are you there?

OH THERE you are!

Finally some super hot (record-breaking even!) and beautiful summer weather in Vancouver. My dresses have been waiting for you!

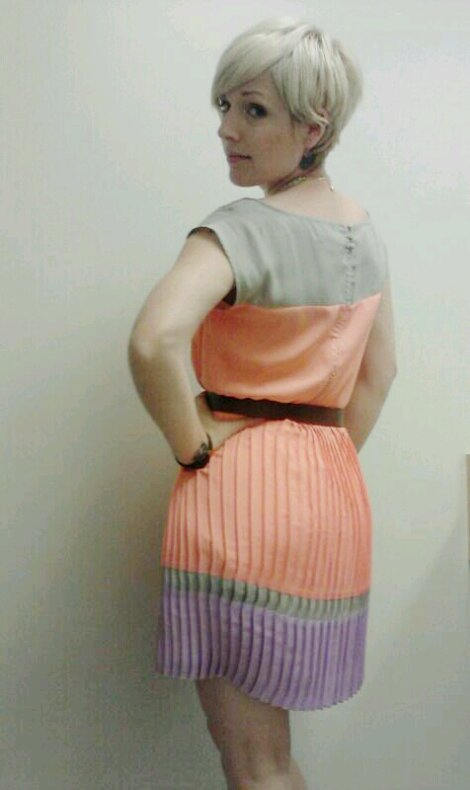
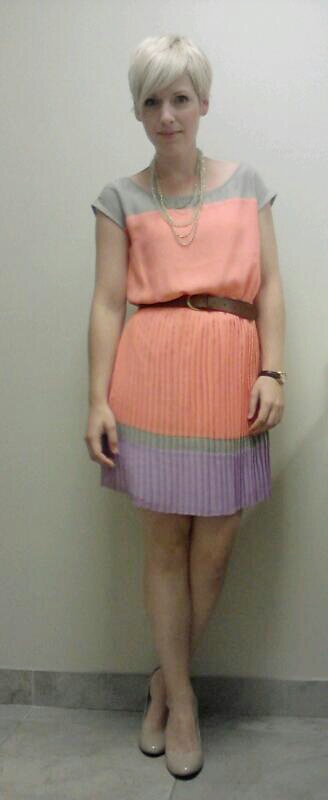
Summer is the perfect time to break out all of those light and airy dresses that just wouldn’t cooperate well with tights in the winter. The dress I wore today was a sorbet concoction of peach and wild berry that I picked up from American Eagle Outfitters last summer. It was so pretty that I just fell in love and it was perfect for my new platinum blonde locks.

image

The only thing was that this particular dress was designed to be open in the back (a la Carrie in Sex in the City) and I’m just not into the whole exposing the bra strap thing… especially at work.

At the same time, for some reason it took me 8 months to do a simple sewing fix and close the gap…augh… but I finally did it.

image

Yay me…but clearly I have far too many projects on the go. I blame Pinterest.

image

Pastels are an excellent way to stay cool and look chic at work during spring and summer. They look fantastic with metallics of any kind….. gold, silver bronze…whatever! They also play well with all of the lighter neutrals such as:

what to wear with neutrals, light neutrals

If you’re a risk taker, a really fun way that’s sure to “Get Noticed” is pairing pastels with their cousin colours in brights. For example:  pastel yellow and canary yellow
What to wear with pastel yellow

Here are some of the ways I’ve worn pastels and other summer colours:

This slideshow requires JavaScript.

What summer colours are your favourite?

image

Elsewhere on the Web:

PS. If you loved this post, share it!

5 Ideas… For Staying Feminine in the Workplace

Whether you work in a formal work environment  or even one that is really casual, it can be difficult to hold onto or even just express your feminine flair.

Let’s be honest.

No matter how far we’ve come, there is always that under current of doubt plaguing our style choice… whispering that we won’t be taken as seriously if we show a sense of femininity. But is that really true? Do you have to dress seriously to be a serious force?

I think not.
Hello …..Michelle Obama anyone? Beautiful, elegant and a total power house.

Yes. You do need to look professional but there is no need to lock yourself down in that navy and white jail cell of a suit.

Need some ideas? Here are 5 Ways to stay feminine in the workplace:

Dresses

Dresses for Work

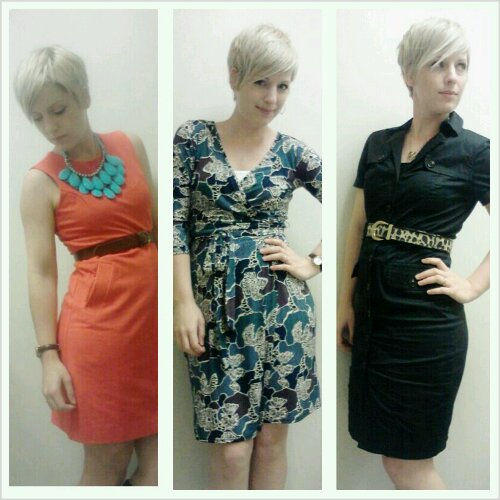
Left (Shift dress from Landsend) | Middle (Wrap Dress from Plum) | Right (Shirt Dress from Club Monaco)

Not only are dresses super easy (ready-made outfit anyone?) But they are inherently feminine because they naturally nip in at the waist and create an hour-glass silhouette Mad Men style . There is NOTHING wrong with showing your shape as long as you understand the boundaries of professionalism.

1. Keep it to the knee and…
2. Save the cleavage for your bedroom.

Speaking of emphasizing your waist…

Skirts

Skirts for Work, what to wear with skirts

Left (Pencil Skirt from Jacob) | Left-Middle (A-line skirt from H&M) | Right-Middle (Pencil Skirt from Banana Republic) | Right (Straight Skirt from Banana Republic)

Skirts also do an excellent job of featuring your waist, as long as you don’t pull your top out and let the hem ride on your hips. You want to make sure you belt it where your waist is in the middle. Again…keep that skirt to the knee or just above to keep the bar high.

Also, keep in mind that skirts are an excellent way to add colour to your bottoms and some real variety to your wardrobe. Read more about the value of coloured bottoms here.

Colour

adding colour to your work wardrobe, how to wear colour at work

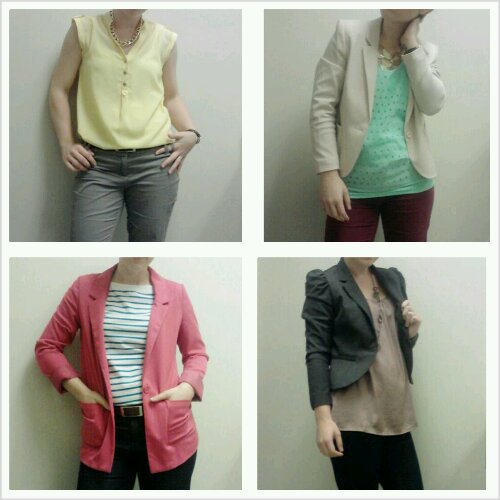
Top Left (Top from Plum) | Top Right (Top from Smart Set, Bottoms from Joe Fresh) | Bottom Right (Blazer from H&M, Top from Jacob) | Bottom Right (Top from RW&Co.)

Colour is one of the easiest ways to play up your female side. No ruffles or bows necessary.

The kind of colour you choose is really up to you but I really like working in some softer colours like the butter yellow in my top (top left). Another great way to work in bolder colours (if you are a little hesitant to go full body) is to work it into your accessories… Like a kelly green bag or a hot pink shoe.

Speaking of shoes… (don’t you love my transitions? Haha)

Heels

Heels for work, Red Heels, Animal Print heels, peep toe heels

Clockwise from top left: Red Heels (Franco Sarto via Freedmans)| Snake Skin Heels (Nine West) | Black (Fergalicious via the Bay) | Nude (Nine West) | Leopard (Chromatic Gallerie) | Pink (Nine West)

Nothing says feminine like a rockin pair of heels! Did you know that they make you look more feminine because the actually change you posture – flexed claves… Bum up and out… Chest high and perky… Oh yes! Femininity at its instinctual level!

Mating stances aside…heels really do make your legs look long and fabulous and I THINK wearing them puts you into a fierce/take charge kind of mindset. Try NOT to be serious with a pair of red heels on. I dare you.

Accessories

Necklaces for work, chunky necklaces

Clockwise from Top Left: Chain (Plum) | Plated Gold (Forever 21) |Yellow Links (Sirens) | Turquoise Teardrop (Baublebar) | Gold Chain (my own) | Red Flame Duo (Baublebar), Peri Quad Blue (Baublebar)

Lastly, we need to talk about accessories but most importantly the V neckline and necklace combo. All accessories can really create that feminine vibe… Earrings, rings, scarves, bracelets…
…but there is something about a V neckline that makes you look long and lean and shows off a beautiful and graceful long neck. Emphasize that with the perfect necklace and you have the perfect combo of elegance and style confidence. irresistable (and covetable).

So remember, above all… A woman is powerful when she knows who she is and what she has to share with the world.

Having fabulous personal style communicates that before you open your mouth.
So, go out there and be powerful…and don’t forget to bring your femininity with you.

Erin

Related Posts: